

I've been a maintenance manager for going on eighteen years, and before that I did four years turning wrenches in an Army motor pool. Both jobs bill your body the same way: bent over equipment half the day, twisting under trucks, hauling parts up and down stairs that were clearly not designed with a tool bag in mind. Add in weekends spent hunting, hauling a canoe to the river, or setting up camp with a pack digging into your shoulders, and by Friday my shoulders and low back feel like somebody wrung me out like a wet towel and hung me back up crooked.
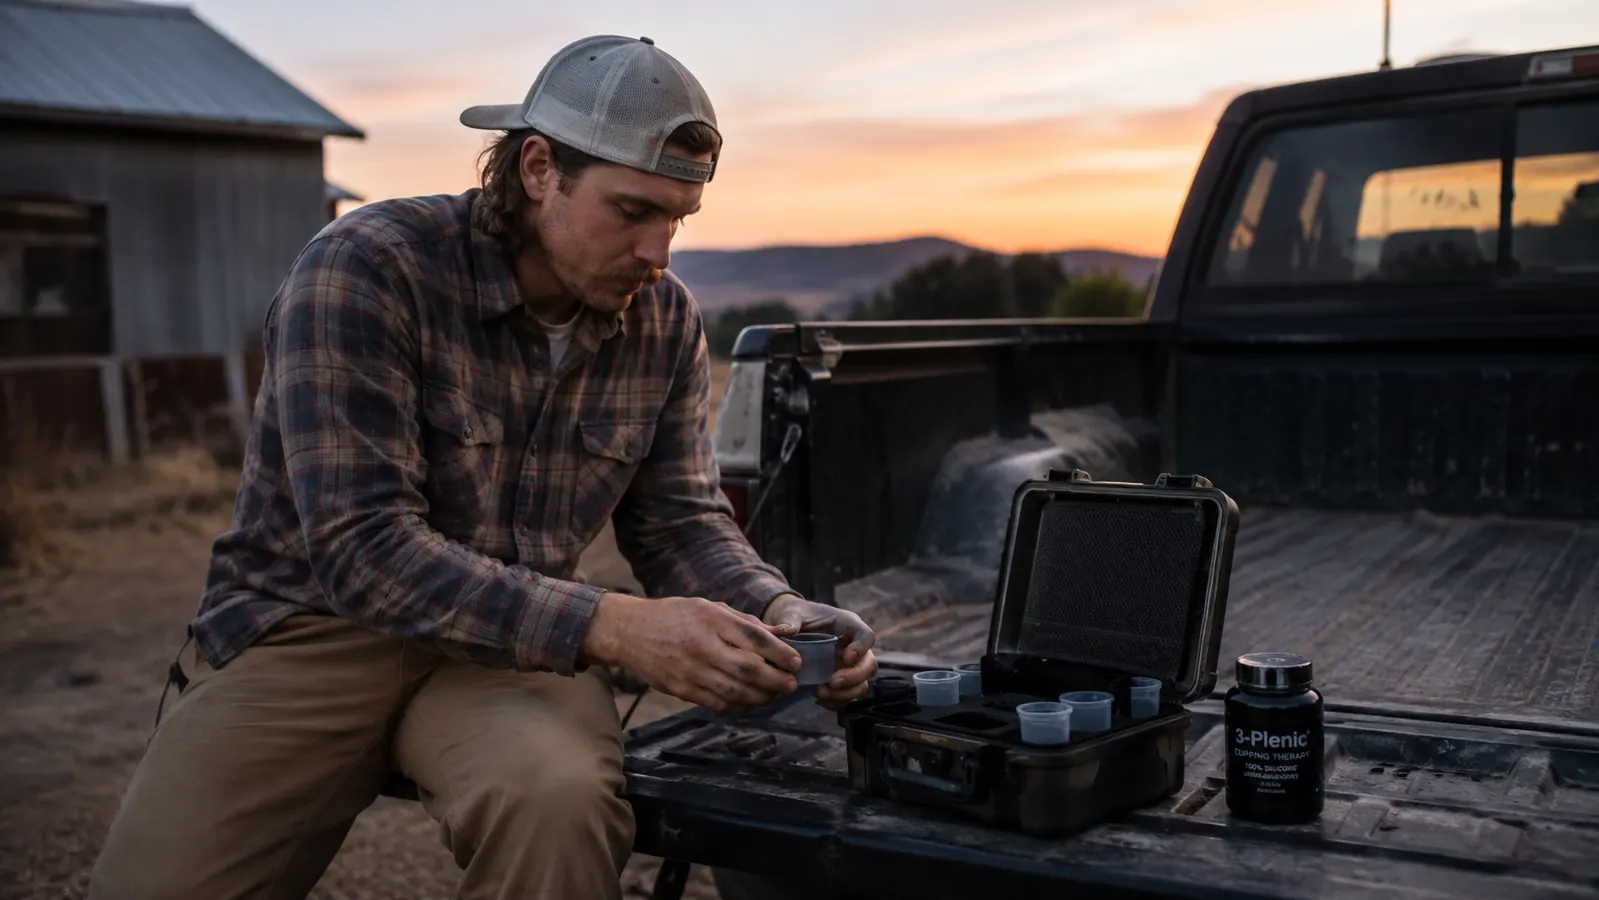
A physical therapist I see maybe twice a year for an old shoulder injury showed me cupping on a whim during a visit, and I figured it was one of those things that looks good on Instagram and does nothing else, the same category as those tape strips athletes wear for the cameras. I was wrong, or at least wrong enough to keep doing it for myself. I picked up a basic four-cup silicone set for under thirty bucks, no pump, no cords, nothing that needs charging, and it's ridden in my truck's console ever since, right next to the tire gauge and a roll of electrical tape.
Cupping works by pulling instead of pressing. A massage gun or a foam roller pushes down into the muscle from the outside in. A cup grabs the skin, fascia, and top layer of muscle and lifts it upward instead, which drags fresh blood into a spot that's been static and cramped all day. That's the whole mechanism, no mystery to it, and no needles or fire involved with this style of cup. This guide walks through exactly how I use one on my own sore spots, shoulders, low back, quads, and calves, so you're not guessing the first time you squeeze one of these things onto your skin and wonder if you're doing it right or about to hurt yourself.
Sore by Friday, Stiff by Monday? Fix It With What's Already In Your Glove Box.
A Lure Essentials silicone cupping set is small enough to live in a truck console or tackle box and doesn't need a pump, batteries, or a manual to figure out. Four cups, a little pressure, five minutes on the spot that's barking at you.
Amazon Check Today's Price on Amazon →Step 1: Find the Right Spot Before You Grab a Cup
Don't just slap a cup on the first tight spot you find. Run your hand over the area first and feel for the actual knot, the place that's noticeably tighter or more tender than the muscle around it, not just wherever's convenient to reach with one hand. On my own body that's almost always the meat of my traps where they meet my neck, or the outside of my hip where it ties into my low back after a day on a ladder or a long stretch kneeling on concrete.
Stay off the spine itself, off any joint, and off skin that's bruised, sunburned, or broken. Cupping is meant for muscle bellies, the big flat sections of tissue, not bone, not a joint capsule, and not raw or irritated skin. If you've got varicose veins, a skin condition, or you're on blood thinners, skip a spot entirely rather than guess your way through it. This isn't the place to improvise past a clear warning sign.
Keep your first session to one or two spots. You'll know within a day whether your body takes to it well, and there's no reason to test five spots at once your first time out. I started with just my right trap, the side that always tightens up worst from favoring an old shoulder, and worked outward from there over the following weeks once I knew how my skin reacted. Take a mental note of how sore or tender the area feels the next morning before you decide to add a second or third spot into the rotation.
Step 2: Prep the Skin and the Cups
Dry skin doesn't hold a seal, so I do this right after a shower while my skin still has a little moisture on it, or I rub in a small amount of lotion or the cheap massage oil that comes bundled with some of these sets. A cup that keeps sliding off isn't stuck to anything, it's just annoying, and you'll spend more time chasing it across your back than actually letting it do its job.
Wipe the Lure Essentials cups down before the first use, and give them a quick rinse every few sessions after that. They're food-grade silicone, which is one of the reasons I like this style over the old glass-and-fire version my grandfather used to talk about from his years in the Philippines, but they still sit in a plastic case and pick up dust and pocket lint before they ever touch your skin.
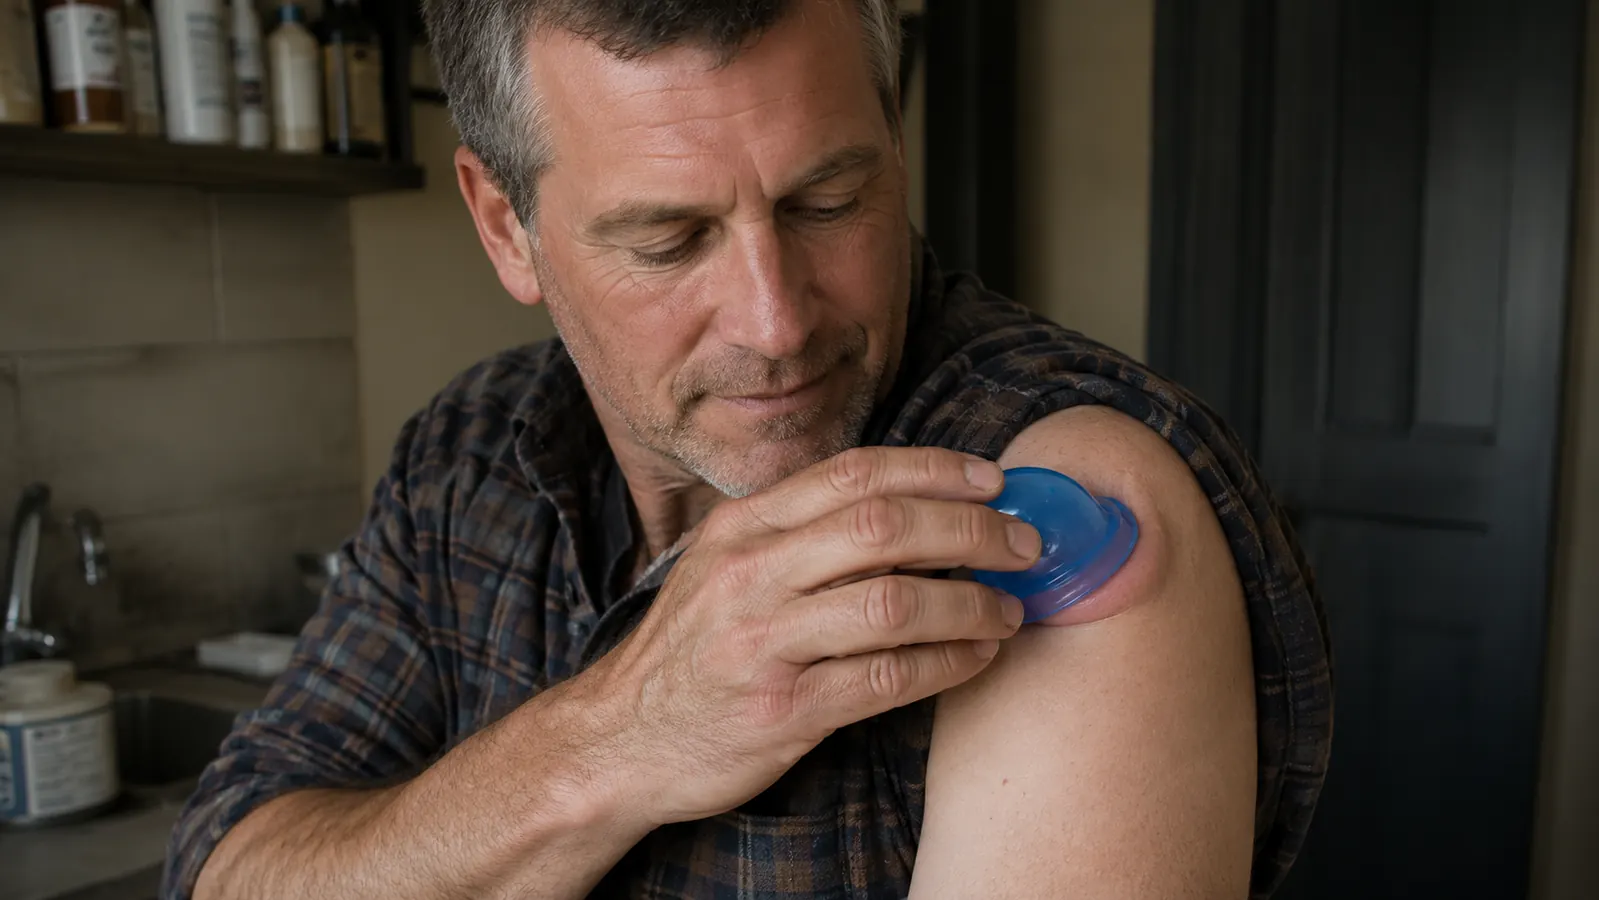
Squeeze the cup most of the way flat between your fingers before you set it against your skin. That's the entire trick to a good seal. You're pushing the air out of the cup, not trying to suction it on like a plunger against a drain, and you don't need a running start or a hard slap to make it stick.
Step 3: Apply the Cup and Set Your Suction Level
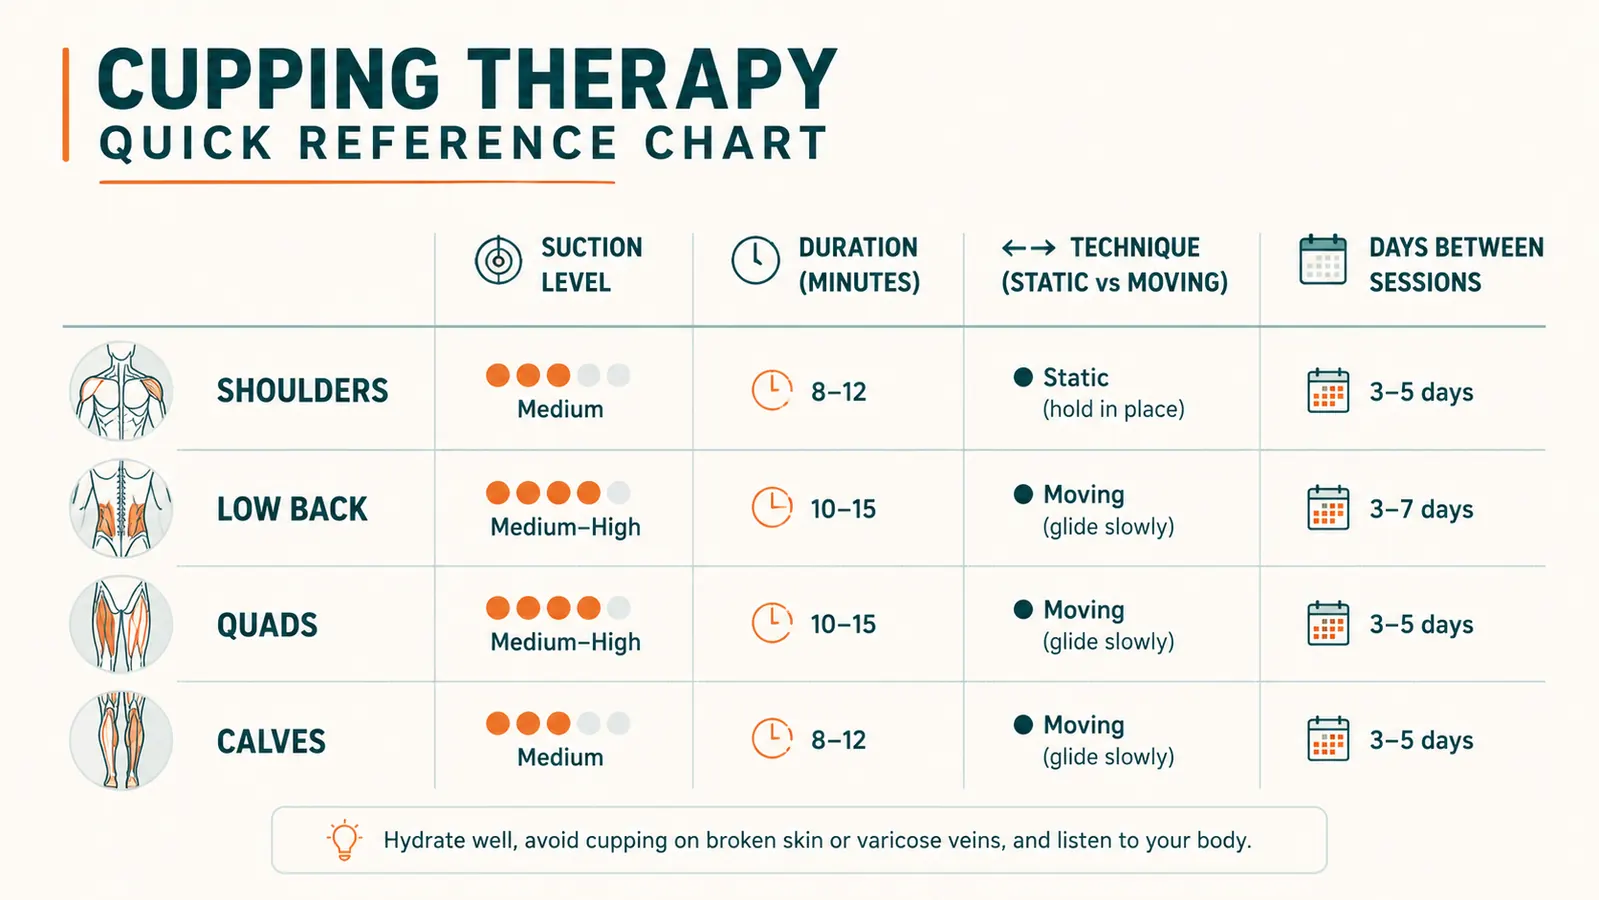
Press the cup flat against the muscle, then let go slowly. The cup pulls the skin up into it as it re-expands, and that pull is your suction. For a first-timer, go light. Squeeze it maybe halfway before you release it against your skin. You want the skin to dome up a bit and turn a shade pinker over the next minute or two, not go dark purple in sixty seconds flat.
If it's genuinely painful, it's too much suction, plain and simple. Pull the edge of the cup to break the seal, let some air back in, and reset it lighter than before. This isn't a tolerance contest and nobody's grading you on how dark the mark ends up by the end of the week. The muscle needs blood flow and a little patience, not a fight you're trying to win.
Leave it in place for five to ten minutes on a new spot, and lean toward the shorter end the first couple times. I set a timer on my phone because it's easy to get distracted checking a text or watching the game and leave one on for twenty minutes without noticing, which just leaves you with a mark that takes two weeks to fade instead of a few days.
Step 4: Decide Between Static and Moving Cupping
Static cupping means you set the cup and leave it in one place for the full five to ten minutes without moving it. That's what I do on my traps and the flat of my low back, spots where I want deep, sustained pull on one specific knot that's not going anywhere on its own no matter how much I stretch it.
Moving cupping is different. You rub a little extra oil on the skin, apply the cup with lighter suction, and slide it slowly across the muscle, up and down the quad or along the shoulder blade, for a few minutes instead of parking it in one spot. That version feels more like a deep-tissue glide from a massage chair and tends to leave less of a mark behind, which matters if you've got somewhere to be the next day.
I use static on the tight, specific spots and moving on bigger flat areas like the quads after a long hike with a pack on, or across my calves after a day spent up and down a ladder. Neither one is more correct than the other. It just depends on whether you're chasing one stubborn knot or trying to loosen up a whole section of muscle at once.
Step 5: Aftercare and How Often to Do It
You'll likely have circular marks after a session, ranging from light pink to a deeper red or purple depending on how much suction you used and how tight the tissue actually was going in. That's blood being pulled to the surface, not a bruise from impact, and it isn't dangerous, but it will look like something happened if someone catches you changing shirts at the gym or peeling off a work shirt in front of your kid. Wear a shirt over it if you've got somewhere to be, and just plan sessions for nights instead of the morning of anything important.
Drink water afterward. I know that's the standard advice for everything from a hangover to a bad knee, but cupping does increase circulation to the area for a bit, and staying hydrated seems to shorten how long the marks stick around, at least in my own experience over the last several months of using this thing on and off.
Give the same spot two to three days before you cup it again so the tissue has time to settle. I run mine maybe twice a week, usually the evening after the worst physical day and again a few days later if something's still nagging at me. Daily cupping on the same knot doesn't speed anything up, it just keeps the skin irritated for no extra benefit and makes the marks harder to explain.
What Else Helps
Cupping isn't a replacement for the basics, and I'd be lying if I told you it fixes everything on its own. I still stretch before I head out to a job site, and I still take an extra minute after a long day to walk around the yard instead of sitting straight down in the truck the second I clock out. What cupping's done for me is give me a five-minute option for the spots that stretching alone never quite reaches, the deep knot under the shoulder blade, the tight band along the side of the hip that flares up after a long drive. Pair it with a decent night's sleep and it does more work than either one alone, and it costs a whole lot less than a standing massage appointment. If you're curious how it stacks up against paying someone for a deep tissue massage, or want the longer rundown on how this particular set has held up in my truck console for months of hot summers and cold mornings, I've written both of those up separately for anyone who wants the full comparison. I've also found it helps to cup the night before a physically brutal day, not just after one, so the tissue starts loose instead of catching up from behind.
Cupping isn't magic. It's just suction, patience, and paying attention to the spot that's actually talking to you.
Keep One in the Truck. Use It Before the Knot Wins.
A basic Lure Essentials silicone cupping set doesn't take up more room than a sandwich, doesn't need charging, and reaches the spots a foam roller can't. Cheapest five minutes of recovery you'll spend all week.
Amazon Check Today's Price on Amazon →